There are other ways of designing a quilt than a computer program. I don't recommend buying a design program unless you are really, really going to use it. I have the gold standard of design programs that I don't use in nine out of ten quilts I make. There are less expensive design programs and I would have been just as happy with them. One issue I do have with EQ6 is that I can not attach a quilt design to an e-mail unless the other person also has EQ without some fancy footwork outside the program.
So how do I design a quilt? I use my 'design bed' or 'design floor' and paper-n-pencil. A design wall could be a nice item to have if you have the wall space for one and don't make king-size quilts. The first quilt was designed on a floor and the other on a bed.

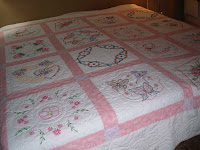
This is the way I was taught to make or design a quilt. Pick a block pattern you wanted and make a mountain of blocks.
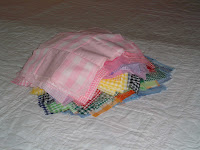
Do this until you are sick of making that block pattern or run out of fabric. Or at least that is the way it looks to me! :>) This is the way my mother and her mother made quilts. Then you lay out your blocks on a bed trying to find a design that appeals.
Most of us put more thought than that into making a quilt. First, you need to know how large a quilt you want to make. Here is a chart for figuring the size of your quilt or type in
Okay, here is where I will do some fudging from practical experience. For king and queen size quilts I will make them square so that all four sides can be used at the top to keep the wear and soiling down of the top edge. With that in mind I also design quilts that aren’t directional, any edge looks good at the top. (See the embroidered quilt above.) My king quilts are 103” by 103” or 100” by 100”. I also don’t design in tucks for pillows because I don’t like the look but you can.
Now you have the size of the quilt and the finished size of the block you want to make. Some simple math will tell you how many blocks you will need to make. The quilt we have been designing is 63" by 87" the 9-patches in the photos are 12" square. 63 divided by 12 is 5 with 3 left over. 87 divided by 12 is 7 with 3 left over. So we need 7 x5=35 blocks with 1.5-inches on all four sides for a border. I'd probably make each border 3 or 4 inches for a more balanced look or eliminate it if you want. So you would only make 35 blocks and then start laying them out to see what you get.
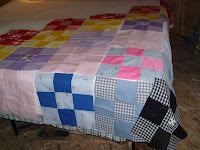
One of the beauties of laying a quilt out on a bed is you get to see the dynamics of what the drop or drape as I call it looks like. It really helps with decisions like where you want the break for borders or sashings to be. You also can go from squared up to on point trying out color placement all at the same time.
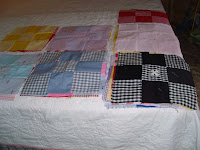
We use to stack up our blocks in a pile, in order after deciding the layout. I have also numbered the blocks to keep them in order.
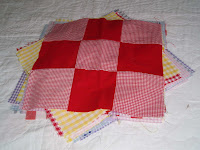
A better way is to lay down a sheet before you begin arranging your quilt. Then when you are done, fold or roll up your sheet until you get a chance to sew it up.
One of the other areas that the 'design wall' process shines in is auditioning different fabrics for sashings, borders or cornerstones. You can lay, say your sashing fabric out next to your blocks, step away and see how you like it. If you don't, keep changing it out until you get something you like. This works real well in a fabric shop if you take in 3 or 4 blocks lay them out and start playing with bolts of fabric. (If the store you go into won't let you do this find a different store!)
I now couple the 'design wall' with paper-n-pencil. I get more accurate sashing, cornerstones and borders. I can change the sizes until I have something that fits into the size of quilt I am making as well as number of borders or sashings.
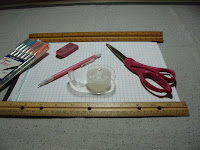
This is what I used to draw the paper-n-pencil version of the quilt I designed in EQ6. When I want to color my quilts I don't normally use markers. What I usually use are colored pencils. Mine have disappeared! A search and recover mission is in my future: >)
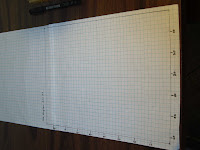
I had to tape two pieces of 1/4" graph paper end-to-end to get a piece the size I wanted to work with in the scale I wanted to use which was 1/8" equals 1". One of the things I do is find center, place it where two lines intersect and measure out from there. I also mark the perimeter of the quilt in ink and then number every 10" around two sides. It helps me to stay within scale and I don't lose the perimeter of my quilt with any wild erasing I might do.
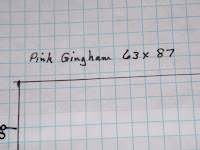
I label my design and write down the dimensions of the over-all quilt. In the space leftover I will list the number of sashing strips, size and how much fabric I need to make it. I do the same thing with each component of the quilt. Except for the blocks because I usually have a stack to work from! : >)
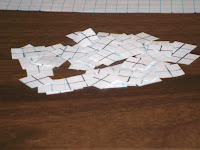
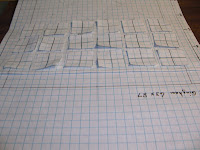
On some quilts I will draw and cut up a batch of blocks to peel and stick to the paper framework I have drawn.
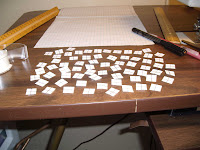
Note that in this pile of blocks is the blocks are smaller than the one below. I messed up on the scale of the blocks!
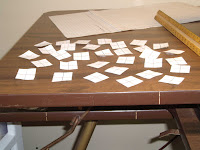
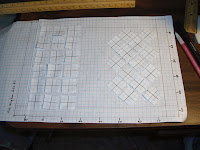
Now with the proper size blocks I started sticking them on the framework looking at design possibilities.
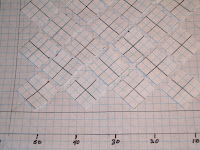
The next photo is both possibilities at the same time.
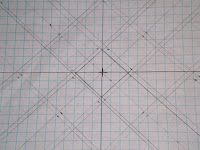
I then removed the paper blocks and started to draw in the blocks with sashings from the center of the quilt.
The next two shots show a comparison between the EQ6 version and paper-n-pencil sketch.

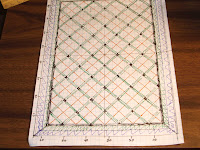
Obviously the EQ6 one is prettier but where, in my opinion, the low tech one shines above the computer generated one is as you were drawing the lines you were doing a trial construction of the quilt. Every line you drew is a seam line!
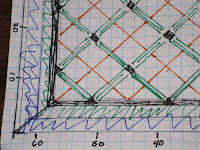
Here is a close-up. I drew in each seam line. When I get to the actual construction I will know how each unit fits into the bigger picture.
Next up is figuring the yardage of each fabric and finding the fabrics I want to use to make this quilt. But first I need to roll the laundry over, feed and water animals since it has stopped raining for a bit. So I will hit the publish button and get back with you.
Have a good day!
Judy
6 comments:
This is so well written out - I love it... I think one of your best article yet... hope you jump on over to our blog and see what my husband did - would love your thoughts on his project.... If you had a twitter or facebook share tap I would of so shared this article - GREAT JOB!!
Evielynne
Looks like you have an excellent system. I only wish I was so organized! LOL I really like the ideas of the design wall as well as the sheet. Things to remember.
Leigh, I am not organized! My home is chaos with occasional sanity.
Evielynne, I will check out his project. I'm somewhat of a Luddite, it took me years to get around to blogging so I don't see twitter or facebook in my future.
I want to thank both of you for stopping by and commenting.
And I can't spell either! 'Thrid' in the title got changed to 'third'. Shesh!
Let me try this again.
I would like to ask you a question and did not see any email address. Do you offer an email address?
Thanks
Ter'e
clindsail@aol.com
Ter'e, I don't publish an e-mail address for privacy and safety issue. I love communicating with ya'all but there are some weird folks out there. So I will drop you an e-mail.
Thanks for stopping by.
Post a Comment