Well, y'all I'm out of here until sometime in January. Sister Suzy graduates the 13th and I WILL be there even if I have to do a 'Planes,Trains and Automobiles' to get there.
Hope every one has a good Holiday!
Judy
Sunday, November 30, 2014
Thursday, November 27, 2014
giving thanks

free clip art from: http://www.hellasmultimedia.com/webimages/
So I am counting my blessings and giving thanks as I go about my day. Celebrating my health, celebrating the roof over my head, celebrating that the cupboard is full, celebrating that with a flick of a switch I have lights, music, and all the conveniences I choose to have. Celebrating that I can grab the keys, head out the door, burn all the gas I can afford wondering around looking at stuff in full stores or looking at nature's wonders. Celebrating my relative safety in my own home as well as in the streets of the community I live in. And above all, celebrating that I have people in my life that really care about my well being.
As I was thinking about past Thanksgivings, I remember with a smile the time that I worked at a small manufacturing plant that made terminal connection boards. We were all excitedly discussing our plans for the holiday when Elfrieda and I were approached by a several of our Laotian co-workers about exactly how to bake a turkey with all the trimmings. They also didn't truly understand what the holiday was all about.
So I ask them if they really liked baked turkey (I don't). No, they didn't, but they thought it was necessary to celebrate the holiday. They were surprised when we ask if in their culture they had holidays where they counted their blessing or gave thanks with a special foods or dishes. They, of course, did. That's when we explained that despite the media hoopla, that was what the holiday was about and that a turkey was not necessary to celebrate. It was way more important to get together with family and friends, count your blessings and eat foods that tasted delicious to you. They seemed relieved they weren't going to have to buy, cook, serve and eat something that was not appealing to them.
So for my Thanksgiving Feast today, I'm not having turkey! I am going to have chorizo topped nachos, tons of fresh veggies, apple turnovers and RC Cola.
Count your blessing and enjoy your dinner!
Judy
Wednesday, November 19, 2014
All Right!
Wa-hoo I'm finally legal in Arizona! After much stressing and two trips today, the car and me are legal. (Yes, I know, it's stupid to stress to the point you're physically ill, but, well, we are talking about me here, are we not.)
First off the check engine light was on and no matter what we did the idiot light would not stay off. Arizona (Phoenix and Tucson) has emissions checks and if the check engine light is on they won't even check the vehicle. Guess what was wrong? The Gas Cap! The rubber seal on the gas cap that pressurizes the fuel system had gotten hard. The error code said the engine was about to commit hari-kiri but that's not how the car has been running since we got the transmission rebuilt. I was sweating catalytic converters, O2 sensors, new injectors and yada-yada. I don't have the money to just start changing parts until they find out what the problem is. The cheapest fix after the tune-up the car got, was change the gas cap. And I saved $100 for the repair shop to 'diagnose' the problem.
Let's just say, it freaks the cops out when the state the car is licensed in does not match the state your driver's license is in. Yup, there is a story that goes with that observation. I kept my Kansas driver's license until I could get the car licensed in Arizona. I honestly thought I was going to have to tag it in Kansas so I would have legal tags on the car from somewhere.
From the research I did on line I needed my Social Security card and birth certificate with my current driver's license. Even the guy at the front desk said that was all I needed. But when I got back to the lady in the cubicle she wanted me to prove I was the same person as named on my birth certificate so she wanted my marriage license. The State of Arizona needs to update their information on the MVD web site, just saying.
I wonder what they do when faced with a common law marriage? Which is legal in Kansas. I forgot to ask the guy I talked to the second time. I know, don't stir the sh!t.
I, also, kept my motorcycle endorsement. I might just want to get a scooter for my 65th birthday. Can you image me riding into the next family reunion on a Hog in full leathers? I can see it now: a white-haired, short, fat, old lady riding a bike bigger than her! That ought to cause the tongues to wag!
So to celebrate the fact I can legally drive through five states to get to Sister Suzy graduation I stopped at Sonic on the way home the second time and bought me a foot-long chili-cheese dog with tots and a large limeade! Yum!
I'm going to tempt The Fates and tackle the next item on the to-do list. I hope everyone is have a good day!
Judy
Monday, November 10, 2014
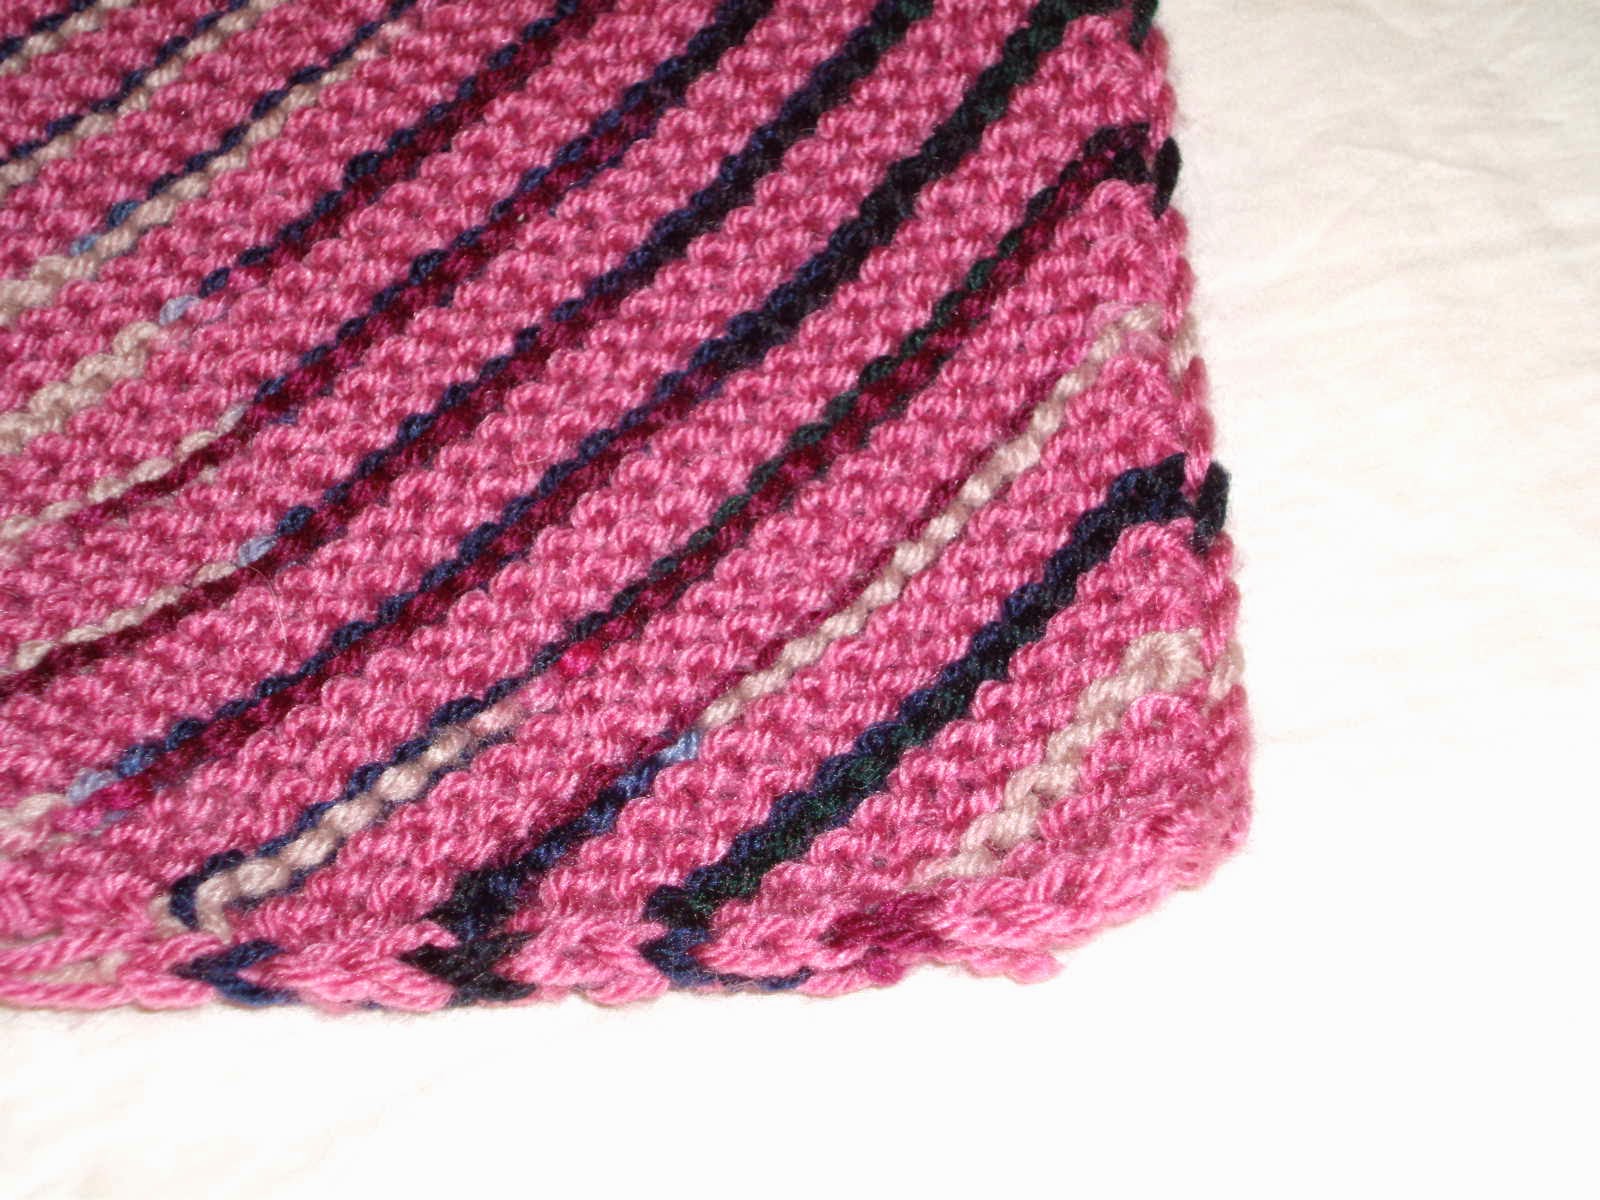
rose sweater
I finished my rose sweater that I have been working on since mumble-mumble. I've posted about it off and on over the last 18 months. The design was a hybrid between a Cuff to Cuff Sweater from the redheart.com web site and the lace pattern off the bottom of a cowl called the Cosy Neck Warmer that I had played around with trying to make into a shawl. It would have worked too, except for keeping the back of my arms warm.
 I haven't washed or blocked the sweater yet so the lace's points are curled a little and bunched. The original sweater pattern was for a short-sleeved wrap sweater with the seed stitch going all the way down the front and around the hem. Well, for me, if I'm going to wear a sweater I want one with long sleeves because the backs of my arms are cold. And since I have no waist tying anything around my waist looks stupid! I, also, need more fabric in the front of my garments because of the boobs and belly. Time to make some design changes!
I wanted a shawl collar so I did some research and figured out how to do some short rows to give the sweater the extra fabric in the collar area.
 The pattern was easy to up-size to my dimensions, however because I wanted a zipper closure I had to pick back about three inches of knitting around the collar and front because the sweater was just too big.
I re-knitted about a 5 inch square on both sides of the front because I decided I didn't want the seed stitch to come as far down on the front of the sweater as I originally thought. I am hoping when I wash and block it the re-knitted part will blend into the rest of the sweater, as it is noticeable right now.

One of the things I read about knitting kimono style sweaters was the side seams tend to be uneven because of the difference between cast-on edges and bind-off edges. So I did provisional cast-ons and then the Kitchener Stitch to sew the edges together. I also did a provisional cast-on for the first sleeve where the pattern tells you to begin because I didn't know how long or wide or how I wanted my sleeves to be finished.
Another decision was whether or not to use the seed stitch all the way down the sleeve. I think it would look just as good with the seed stitch stopping an inch below the shoulder line. I debated on using the lace pattern around the cuffs but couldn't figure out how to knit the pattern in the round. I think that would have looked nice too.
 When I got around to inserting the zipper I used Techknitter's technique of making live stitches on the zipper itself. As you can see one side is installed closer to the zipper's teeth than the other side. One of the thing I didn't read was how far away you should stay from the zipper teeth. So the first side I picked up stitches on the outside third of the tape and thought that was too far away (exposing too much tape). So on the second side I went in to about to about two-thirds of the tape width and liked it much better. If I ever insert a zipper into another sweater I will get even closer to the zipper. I used the Kitchener Stitch to attach the sweater to the zipper and then, used Jeny's Surprisingly Stretchy Bind-Off around the collar.
Oh, and, if you are in Phoenix go to SAS fabric stores that zipper cost me a dollar and you can sometimes buy fabric by the pound!
All and all, I like the fit and I think the sweater will keep me warm as I head back to Kansas for Sister Suzy's graduation.
I hope everybody is having a good day!
Judy
I wanted a shawl collar so I did some research and figured out how to do some short rows to give the sweater the extra fabric in the collar area.
I re-knitted about a 5 inch square on both sides of the front because I decided I didn't want the seed stitch to come as far down on the front of the sweater as I originally thought. I am hoping when I wash and block it the re-knitted part will blend into the rest of the sweater, as it is noticeable right now.
One of the things I read about knitting kimono style sweaters was the side seams tend to be uneven because of the difference between cast-on edges and bind-off edges. So I did provisional cast-ons and then the Kitchener Stitch to sew the edges together. I also did a provisional cast-on for the first sleeve where the pattern tells you to begin because I didn't know how long or wide or how I wanted my sleeves to be finished.
Another decision was whether or not to use the seed stitch all the way down the sleeve. I think it would look just as good with the seed stitch stopping an inch below the shoulder line. I debated on using the lace pattern around the cuffs but couldn't figure out how to knit the pattern in the round. I think that would have looked nice too.
Oh, and, if you are in Phoenix go to SAS fabric stores that zipper cost me a dollar and you can sometimes buy fabric by the pound!
All and all, I like the fit and I think the sweater will keep me warm as I head back to Kansas for Sister Suzy's graduation.
I hope everybody is having a good day!
Judy
Sunday, November 2, 2014
not feeling the love
I'm just not feeling the love for the quilt I'm working on. I think the biggest problem is it is another king-size quilt. This makes three in a row, and this one is being quilted as one big top. I'm tired of wrestling it in my machine. However, I am about 2/3 done, so I am going to lay it aside for a few days.

I think I will start getting everything ready to head to Kansas for Sister Suzy's graduation and Hubby's memorial service. I've started by deciding what knitting I wanted to take with me.

 I posted about this afghan back on May 20, 2012 and haven't done a whole lot more to it since then. When I pulled it out this afternoon I had to go out on the web to watch a video on how to do cables because I couldn't remember the steps. Oh My! Well, I have two more rows knitted on it, and how to knit cables is back from the recesses of my mind. Yeah!
I need to start a physical list so I can remember everything I need and want to take with me. Otherwise, I will forget something important like my coat or the cat. LOL She is not going to be happy with me. She does not like to travel.
I hope everybody is having a good day! The buzzer for my dinner just went off and I am hungry.
Judy
I think I will start getting everything ready to head to Kansas for Sister Suzy's graduation and Hubby's memorial service. I've started by deciding what knitting I wanted to take with me.
I need to start a physical list so I can remember everything I need and want to take with me. Otherwise, I will forget something important like my coat or the cat. LOL She is not going to be happy with me. She does not like to travel.
I hope everybody is having a good day! The buzzer for my dinner just went off and I am hungry.
Judy
Tuesday, October 28, 2014
a case for prewashing
When cleaning out the mother-in-law's apartment after moving her into assisted living we came across this wall hanging that her mother had made. Nobody wanted it so I took it.
 It needed a bath, which I finally got around to doing the other day. :-) I hand-washed it in a sink of cool water with some serious toothbrush time in one spot on the white background that was a yellow greasy looking stain. Which, thankfully, when it dried is not that visible.
It dried with the puckered look you see in the photo. While examining it closely to figure out why it was not flat this is what I observed.
 The gray fabric of the basket had shrunk! Damn! I can do one of two thing, leave it as is OR unpick the basket and re-appliqué it and hope like hell it doesn't shrink any more. I'm going to go with the first option because I'm not that great at appliqué and sometimes less, is more.
The moral of the story is pre-wash your fabrics because I'm sure Hubby's grandmother would be upset about the puckering.
Oh! And here is a picture of Psycho Cat. Isn't she the most pitifulest thing you ever saw?
 She doesn't fool me. I see that red gleam in her eyes. LOL
I hope everyone is having a good day!
Judy
It dried with the puckered look you see in the photo. While examining it closely to figure out why it was not flat this is what I observed.
The moral of the story is pre-wash your fabrics because I'm sure Hubby's grandmother would be upset about the puckering.
Oh! And here is a picture of Psycho Cat. Isn't she the most pitifulest thing you ever saw?
I hope everyone is having a good day!
Judy
Sunday, October 19, 2014
mug cakes
I was hungry for a piece of cake, but didn't want to make a whole cake; not even a single layer cake because I will eat the whole thing in a short time frame. You know a piece with dinner, a piece for a bedtime snack, a piece for breakfast, mid-morning, lunch, just because it is there until it is gone. So I thought how about a mug cake. They equal a large slice of cake, get my fix and it won't be in the fridge calling my name. JuuDddYyy JuuDddYyy Aye Taaaste Gggoooddd!
So I wondered around the net looking at recipes. One of my problems with mug cake recipes is no one tells you the volume of the mug they are using. My mugs range from one-cup to two-n-a-quarter cups. So would the recipe overflow in the microwave if I used the one-cup mug or am I going to need a magnifying glass to find it in my big mug? Nobody answers that question. I tend to error on the side of too large. I don't want to waste any cake batter! ; >)
I found a recipe over at thehungryhedgehog called apple cinnamon mug cake. Jess says it makes a small cake and comes with an icing recipe. The cake looks about the size of a cupcake so I doubled it and sprinkled powdered sugar on top. It was okay, if you really like cinnamon. I went back to the web checking apple cake recipes for the cinnamon to flour ratio, which confirmed my feelings there was way, too much cinnamon and not nearly enough apple.
The first thing I did was make up a batch of Apple Pie Spice I found at southernfood.about.com
I just realized I use twice as much cinnamon as they call for.
1 tsp cinnamon
1/4 tsp nutmeg
1/8 tsp allspice
1/8 tsp cardamom
Next up I re-hydrated some apple fruit leathers I had made a while back .8 ounces or 22 grams of dried apple to a half-cup of boiling water let set ten-fifteen minutes to re-hydrated; then blend well.
My rendition of Applesauce Mug Cake
I used my two cup mug but a cup-n-a-half would probable be big enough. Spray the mug with non-stick spray or grease. Use a cereal bowl to mix it in.
6 Tbsp flour
2 Tbsp sugar (can use brown)
1/4 tsp apple pie spice
1/4 tsp baking powder
4 Tbsp applesauce
1 Tbsp vegetable oil or melted butter
1 Tbsp milk or 1 tsp of powdered milk and 1 Tbsp of water
1/4 tsp vanilla extract.
1 Tbsp chopped nuts (optional)
1 Tbsp chopped raisins or dates (optional)
Mix the dry ingredients. I added the nuts and raisins to the dry ingredients. Then the wet and mixed until the dry ingredients were wet and no lumps. Scrap the batter into the prepared mug and microwave 60 to 90 seconds depending on your microwave. I would stop it at 60 seconds and use a toothpick to see if it is done before adding the last second 30 seconds.
Because I doubled the recipe, I think it would work in two one-cup mugs. I would shorten up the time to 45 seconds before checking so see if it was done.
I found a Butter Sauce Recipe for an apple cake that I liked the looks of and now that I want to give credit to the blog I found it on, I can't find the blog again. Crap!
EDIT: think I found it: http://www.food.com/recipe/chunky-apple-spice-cake-with-vanilla-butter-sauce-15682
1 Tbsp butter
1 Tbsp heavy cream or 1 tsp of creamer and 1 Tbsp water
2 Tbsp brown sugar or 2 Tbsp sugar and 1/2 tsp molasses
1/2 tsp vanilla extract
Mix first three ingredients in a 1-cup ramekin. Cook in 10 to 15 second bursts stirring between each burst until it has thickened about 90 seconds total. Carefully pull out of the microwave and add the vanilla extract. Pour over the cake hot. I loosened up the sides of the cake so the butter sauce would run down the sides of the cake and bottom too. There is more than enough here to cover the two smaller mug cakes if that was the way you made it.
I hope everyone is having a good day!
Judy
Sunday, October 12, 2014
well here i sit
Well, here I sit...time to make a blog post and, well, I didn't get much accomplished this week.
I got the quilt for my niece pin-basted and three blocks quilted. I got tried of fighting the quilt in the spot I had my sewing machine. So I moved everything back into the second bedroom, my sewing machine, computer, and ironing board.
Then, I went to the living room and moved hubby's computer and the printer back in with my stuff. The living room looks better, I just need to gather up the odd computer paraphernalia and get it moved out of the living room. My bedroom feels less cramped, so that's better.
The closet in the second bedroom is getting a cleaning out. I have a spot on one wall I want to turn into a cutting table like I had in Kansas.

Been fighting the computer and places he had accounts set-up trying to get things shutdown. Me and the cable company are about to come to blows. There is no place on their web site to report a death and dealing with the stupidity on the phone is wearing thin. I suppose I wouldn't be so aggravated with the cable company but I don't watch TV. In fact, I don't even know how to turn the boob-tube on. I have four remotes setting on the lamp stand. Which one operates what? I don't know! And no where, on any of the electronics, is there a simple on/off switch! This probably hasn't helped my asthma either, come to think of it.
Enough grousing, I hope everyone is having a good day.
Judy
I got the quilt for my niece pin-basted and three blocks quilted. I got tried of fighting the quilt in the spot I had my sewing machine. So I moved everything back into the second bedroom, my sewing machine, computer, and ironing board.
Then, I went to the living room and moved hubby's computer and the printer back in with my stuff. The living room looks better, I just need to gather up the odd computer paraphernalia and get it moved out of the living room. My bedroom feels less cramped, so that's better.
The closet in the second bedroom is getting a cleaning out. I have a spot on one wall I want to turn into a cutting table like I had in Kansas.
But I'm stuck because I have to sort through his music and computer stuff. I felt my chest tightening up with my asthma as I was trying to decide what to do with his stuff, so I have backed off there. I've babied my lungs the last couple of days.
Been fighting the computer and places he had accounts set-up trying to get things shutdown. Me and the cable company are about to come to blows. There is no place on their web site to report a death and dealing with the stupidity on the phone is wearing thin. I suppose I wouldn't be so aggravated with the cable company but I don't watch TV. In fact, I don't even know how to turn the boob-tube on. I have four remotes setting on the lamp stand. Which one operates what? I don't know! And no where, on any of the electronics, is there a simple on/off switch! This probably hasn't helped my asthma either, come to think of it.
Enough grousing, I hope everyone is having a good day.
Judy
Sunday, October 5, 2014
making a quilting stencil
While I was out cruising the web I stopped by Amanda Jean's blog crazy mom quilts a while back and she was showing a quilt she had complete with a free-hand quilting pattern I thought would look good on my jelly roll/lasagna quilt. I don't free-hand quilt because, honestly, I don't want to put the practice in to be good at it. So what to do?
 Remember making your own stencils before you could buy Mylar quilting stencils? Being the antique that I am (Actually I'm still only a collectible because I'm still less than a hundred.) and inheriting a few from my mother, I did just that. Time to get the old trusty paper and pencil out, again.
My first step was to draw a strip two inches wide (that's the width of my fabric strips). Find center, and then draw two lines the width you think you want the quilting to be. The first try I decided I would make the quilting one-inch wide. Using the cap off my vitamin bottle to make my curved line I drew a sample. I thought the first try was too wide, so on the next try I cut the width of my curved line down to a half-inch. I liked it much better.
 Next, I opened up a cereal box and drew the pattern on to it, then cutting the design out. I used my graphite and white quilting pencils to draw the pattern on four of the nine patches of the quilt. As you can see I drew the curved lines down the centers of the strips both front and back of the selected blocks.
 Kind a looks like jigsaw puzzle pieces to me! I think it helped the over-all look of the quilt having some blocks quilted this way and some with stitch-in-the-ditch.
 For the borders I decided a large diamond would be just the ticket for finishing off the quilting. Also notice, I used white thread for the large blocks and black thread for the border. Don't be afraid of using different color threads for the quilting it can make a dull quilt come to life.
I think I am going to continue channeling my mother today and stay in my nightgown all day. Maybe do some baking (cookies and bread) and a pot of soup sounds good, too.
I hope everyone is having a good day!
Judy
My first step was to draw a strip two inches wide (that's the width of my fabric strips). Find center, and then draw two lines the width you think you want the quilting to be. The first try I decided I would make the quilting one-inch wide. Using the cap off my vitamin bottle to make my curved line I drew a sample. I thought the first try was too wide, so on the next try I cut the width of my curved line down to a half-inch. I liked it much better.
I think I am going to continue channeling my mother today and stay in my nightgown all day. Maybe do some baking (cookies and bread) and a pot of soup sounds good, too.
I hope everyone is having a good day!
Judy
Sunday, September 28, 2014
How to move front pockets
I should have posted this weeks ago, but, well, life has kind of gotten in the way. Here's a link to the original post so you can tie the two together. So, this is how I move front pockets when tailoring a pair of pants.
 As you are marking the cutting line up the leg put those marks on the pockets.
 Transfer those lines to the fabric of the pant legs to the seam where the pocket joins the front. Then get your handy-dandy seam ripper out and CAREFULLY remove the pocket unit from the pant leg.
 Then pin the pocket back in to match up on the new cutting line. Now you can cut all the excess fabric off the front pant leg using the pocket edge as your cutting edge. You will be able to see where any notches need cut or stay-stitching needs done.
 On this pair of pants the pockets were twisted. Probably because the fabric was off grain and after they were washed and all the sizing was removed the fabric returned to its natural lay. Another reason to always prewash your fabric. I did have to take the pockets apart, re-cut and re-build them so they would lie flat in the garment. Not something you normally have to do.
 Lay the right side of the pocket facing against the right side of the front, pin and sew. I usually set the pocket on the inside of the front where it goes and then flip it to the front to make sure I putting the right pocket on the right side of the pants. Cause, well, I've been wrong before.
 Clip any corners, flip, iron, top stitch, and press everything flat. Pin the pocket edges to the side of the pants and to the waist of the pants, then baste the pocket edges where they meet the sides and waist of the front. Bar-tack (usually a narrow, short [quarter to half inch] zig-zag) at the bottom of the pocket opening and at the top of the pocket opening.
As you can see the side of the pants is a smooth line, but at the waist I have a little of the pocket peaking above the waistline. This had to do with the way Hubby's pants needed to be tailored. (Interesting note: less than 12% of the people in any given size are actually those measurements.) I just trim that little bit off. To me having the side of the pocket lying right is more important than that little bit at the top of the pocket that needs trimmed off.
 Now you just finish sewing the pants back together!
I hope everybody is having a good day!
Judy
As you can see the side of the pants is a smooth line, but at the waist I have a little of the pocket peaking above the waistline. This had to do with the way Hubby's pants needed to be tailored. (Interesting note: less than 12% of the people in any given size are actually those measurements.) I just trim that little bit off. To me having the side of the pocket lying right is more important than that little bit at the top of the pocket that needs trimmed off.
I hope everybody is having a good day!
Judy
Sunday, September 21, 2014
my heart is broken
My heart is broken; my compadre in life is gone.
Hubby passed away Friday morning sometime between 9:00 am and 11:30 am while we were taking a nap after a night where neither one of us slept well.
I relieved I don't have to watch him struggle to make himself understood. But I miss his rapier wit.
I am relieved he no longer hurts so much he had to have help most days to get out of his chair. But I miss his gentle smile.
I relieved I don't have to watch him struggle after the gout crippled his hands so bad he couldn't do the simplest tasks some days. But I miss his touch.
I am relieved he is no longer in so much pain he couldn't lay down to sleep. But I miss the mischievous twinkle in his brown eyes.
My heart is broken; my rock in life is gone.
Judy
Sunday, September 14, 2014
my take on a jellyroll race quilt
This is my take on a jellyroll race or lasagna quilt. I wanted to do one and I needed
to make a quilt for a wedding gift for a friend's granddaughter so away I
went.
 I studied several you-tube videos. Starting with the Missouri Quilt Co. video with a white block spacer between each new strip. When I got to thinking about how I would construct and quilt a king-size quilt I decided to turn it into a giant nine-patch. I decided that a random placed white patch might not look so hot so I went with the original jellyroll race quilt look.
A 40-strip jelly roll will make approximately 50" by 64" quilt. So how would you expand it to get a king-size quilt? Web surfing to the rescue, of course! And now that I want to write it up I can't find the you-tube videos that explained how to make different sized quilts! Damn-it!
EDIT: Found It! Jean JellyRollQueen
Part 2
Any way, I wanted to make an 84" by 84" center. The formula is to take inches wide times 32 rows, then divide by the length of the strips for how many strips in the main body of the quilt. Next for the 20 inches left over which is 10 rows do the formula again to know what you need for the added length of the quilt you want to make. Okay, clear as mud, right! LOL!
Main Body 84 x 32 = 2688 / 41 = about 66 strips (round up)
Second Half 84 x 10 = 840 / 41 = about 21 strips (round up)
Add 66 strips + 21 strips = 87 strips of 2 1/2" fabric.
The advice of the lady who posted the you-tube videos was to add a few extra strips so you wouldn't be short.
This lady's advice on adding the extra strips to get the length of quilt you wanted was to add them evenly to the top and bottom, in my case five rows top and five rows bottom. Just to make sure I had enough (cause I'm paranoid like that) I stopped and measured my strips when I had sewn the first seam in the first batch of strips together. I was too long and trimmed it back to the size I needed.

This is the back. I randomly sewed strips I had cut from the stash together.

Cut and turned as a nine-patch

See those two yellow strips that are side by side? That's the middle of your long strip of fabric, which would be no big deal if you were leaving as one big piece. However, I wanted to make blocks, so I picked off that bottom row and re-sewed it to the top of that block.

This is the front. I decided to sort the fabric into color families and I changed up the construction, too. After I had sewn the long strip in half, I cut the strip in the lengths I need for the width of the quilt top. Then I sewed the top in three sections before cutting it into my blocks. I think it turned out better. I didn't have any spots where the fabric doubled over on top of it self.
 This is the nine-patch layout of the top.
 I didn't like the original border fabric I had picked out so I switched to this black print. Better but still not the pop I was looking for. I decided to use cornerstones to finish the borders. After sewing them on I liked the square-in-a-square the best.
I'm thinking I should have used black strips to set the quilted blocks together. That might have helped the over-all look of the quilt by giving the eyes someplace to rest from busyness of the quilt.
Will I make another jelly roll/lasagna quilt? Only if it is in a size I could comfortably quilt as one piece in my machine, so that would mean probably nothing bigger than a twin or maybe a double with a traditional weight batting.
 So the label is on and the quilt is ready to be shipped. Now to finish up another quilt I'm working on for a wedding in October.
Everybody have a good day!
Judy
A 40-strip jelly roll will make approximately 50" by 64" quilt. So how would you expand it to get a king-size quilt? Web surfing to the rescue, of course! And now that I want to write it up I can't find the you-tube videos that explained how to make different sized quilts! Damn-it!
EDIT: Found It! Jean JellyRollQueen
Part 2
Any way, I wanted to make an 84" by 84" center. The formula is to take inches wide times 32 rows, then divide by the length of the strips for how many strips in the main body of the quilt. Next for the 20 inches left over which is 10 rows do the formula again to know what you need for the added length of the quilt you want to make. Okay, clear as mud, right! LOL!
Main Body 84 x 32 = 2688 / 41 = about 66 strips (round up)
Second Half 84 x 10 = 840 / 41 = about 21 strips (round up)
Add 66 strips + 21 strips = 87 strips of 2 1/2" fabric.
The advice of the lady who posted the you-tube videos was to add a few extra strips so you wouldn't be short.
This lady's advice on adding the extra strips to get the length of quilt you wanted was to add them evenly to the top and bottom, in my case five rows top and five rows bottom. Just to make sure I had enough (cause I'm paranoid like that) I stopped and measured my strips when I had sewn the first seam in the first batch of strips together. I was too long and trimmed it back to the size I needed.
This is the back. I randomly sewed strips I had cut from the stash together.
Cut and turned as a nine-patch
See those two yellow strips that are side by side? That's the middle of your long strip of fabric, which would be no big deal if you were leaving as one big piece. However, I wanted to make blocks, so I picked off that bottom row and re-sewed it to the top of that block.
This is the front. I decided to sort the fabric into color families and I changed up the construction, too. After I had sewn the long strip in half, I cut the strip in the lengths I need for the width of the quilt top. Then I sewed the top in three sections before cutting it into my blocks. I think it turned out better. I didn't have any spots where the fabric doubled over on top of it self.
I'm thinking I should have used black strips to set the quilted blocks together. That might have helped the over-all look of the quilt by giving the eyes someplace to rest from busyness of the quilt.
Will I make another jelly roll/lasagna quilt? Only if it is in a size I could comfortably quilt as one piece in my machine, so that would mean probably nothing bigger than a twin or maybe a double with a traditional weight batting.
Everybody have a good day!
Judy
Saturday, August 30, 2014
a moment of inspiration
I think I may have salvaged the quilt I'm working on. I had a moment of inspiration when I woke up yesterday morning and it looks like it might work. Yeah!
Back to it.
Everybody have a good day!
Judy
Back to it.
Everybody have a good day!
Judy
Thursday, August 28, 2014
i'm alive and bored
I'm alive and bored to tears with the quilt I'm working on. It is bordering on ugly to me and I can't think of a way to save it. The quilt should have been finished last week and mailed by now. I can't bring myself to finish it. I need to slog on through because I have another one due out of here by the middle of October. Then I have another one I've been working on for a while I want to finish before Christmas and get out of here also.
I'd rather be knitting. I found a pattern for an afghan I really like how it is coming together. I am using three colors: green, white and blue. Other than the 20 skeins of yarn to work the afghan in intarsia, it is an easy knit.
Hubby speech is getting better as time passes. And so long as we don't OD on pork products his gout wouldn't be flaring up. Some days I worry about us!
Missing Sister Suzy as she is back in Kansas for her last semester of college. She called and ask for a care-package of Chocolate Gummy Bears and Tiger Sauce. We will have to wait until it cools off before we can ship the chocolate.
I hope every one is having a good day!
Judy
Sunday, July 27, 2014
I'm not Job
God, I am piss-off at you! After the second day of orientation for hubby's teaching position after being laid-off for four years, he comes home and has a stroke between 4:30 and 5:00. I am grateful the stroke didn't happen while he was driving home or while he was a sleep. And I am grateful it wasn't worse, that it has only affected the muscles in his throat and face on the right side. But really, enough is enough! How about a break here? I'm not happy about You playing craps with my life like you did Job's! Oh, and thank-You for not killing off all my loved ones!
UPDATE: 8/9/2014 Hubby is home and we are doing speech and physical therapies. He is still pretty Dutchy and the Cardiologist says he has a weak heart muscle so it is gentle cardo until the heart is built back up.
UPDATE: 8/9/2014 Hubby is home and we are doing speech and physical therapies. He is still pretty Dutchy and the Cardiologist says he has a weak heart muscle so it is gentle cardo until the heart is built back up.
Friday, July 11, 2014
hubby is losing it
Hubby is losing it! His dress clothes are waaayyy too big. He hasn't really wore his dress clothes since he was he was laid-off four years ago. I knew his dress clothes were getting loose, but oh-my! He has to hang on to them to keep them up! LOL
He had an interview and since we are flat broke, I sat aside my quilt and went to work. I have two pair of pants remodel. The great part is he signed the contract this morning! Yeah! So I have to get with it and finish up the rest of his dress pants.
I'm going to let his dress shirts go until after his pants are done. I'm not real sure I want to tackle his suit jacket. (I done it before. I made his three-piece suit for our wedding.) Maybe, after he has worked a couple of months we can go shopping for a new suit jacket and donate his older one.
For those who have never tailored a pair of men's pants here is how I do it. First thing I do is have whomever try on the garment and kind of look over where the problems are. The next thing I do is get my handy-dandy seam ripper and CAREFULLY remove most of the waistband. I leave the very front attached. I don't want to mess with the zipper if at all possible.
Have them put the garment back on and start pinning out the excess fabric making sure back pockets and such stay in the right spots on the body. There are two ways to do this. One is wrong side out, which is easier. However, the correct way is right side out, as they would wear the garment. This takes into account the fact that no body is symmetrical.
Have them take the garment off. Get a note pad and start measuring what you pinned out and where; then writing it all down. If you don't have to take out more than an inch out of a seam you won't need to use your seam ripper to remove seams. However, if you need to take up side seams you are going to have to move pockets. So get your seam ripper out and CAREFULLY start ripping the seams out. Make notes as to where all the bar-tacks are; any top stitching you take out. Pay careful attention to how the garment was sewn together and how the pockets were built. You will not be able to move the back pockets if they are plackets but most front pockets can be.
One other thought, leave any belts loops attached to the body of the pants if you can, because they won't move more than an inch ether way when you get ready to reattach everything. I know weird! You take out nine inches in the waist and the belt loops don't move that much.
 These are his pants ripped apart; the seams and pockets pressed flat with the notes. I pinned the front side seams together and the back side seams together so I could mark and cut the sides the same. I did not rip the inseams out or the back center seam.
 I got my tape measure out and marked where I need to cut based on my notes. I then moved the pins just inside my cutting line and cut. I was feeling quite brave and did not do the prudent thing on this pair. Which is to baste up the seams and have him try the pants on, one more time. It may come back to haunt me when he tries them on and they are too tight!
 You can see where I fiddled around with the lines trying to get a smooth transition from one angle to another. You can also see where I moved the marks for the pockets to the new cutting line. The pockets in these pants were easy to move because they were side seam pockets. I used a pleat to take out the extra fabric in the front of the pants as that is the style of pants Hubby finds most comfortable. One pleat goes on the fold line up the front of the pants. The two-pleat style goes either side of the fold line.
Put the pockets back on with any top-stitching and bar-tacking required. Do the center back seam with any top-stitching needed. Sew up side seams and any seam finishing. Add any top-stitching required to the side seams. Pin the waistband from the front to center back. Pin where you need to take out the excess with a seam. Trim the excess out and sew the waistband on. Reattach the belt loops and you are done.
The other way to get rid of the excess fabric in the waistband is to take off whichever end of the waistband would be the easiest to rebuild. If you have a riveted button you would take off the buttonhole end and make a new buttonhole. On these pants if I were to do it this way I would have taken off the button end. Trimmed the excess off and reattached the button. The reason I don't do it the 'correct' way is the zipper and the buttonhole! It can be a total nightmare! The other way is easier for me. And if they wear a belt, who's to know?
Hey, everybody have a good day!
Judy
Update: The post on how to move the front pockets is here, if you need it.
He had an interview and since we are flat broke, I sat aside my quilt and went to work. I have two pair of pants remodel. The great part is he signed the contract this morning! Yeah! So I have to get with it and finish up the rest of his dress pants.
I'm going to let his dress shirts go until after his pants are done. I'm not real sure I want to tackle his suit jacket. (I done it before. I made his three-piece suit for our wedding.) Maybe, after he has worked a couple of months we can go shopping for a new suit jacket and donate his older one.
For those who have never tailored a pair of men's pants here is how I do it. First thing I do is have whomever try on the garment and kind of look over where the problems are. The next thing I do is get my handy-dandy seam ripper and CAREFULLY remove most of the waistband. I leave the very front attached. I don't want to mess with the zipper if at all possible.
Have them put the garment back on and start pinning out the excess fabric making sure back pockets and such stay in the right spots on the body. There are two ways to do this. One is wrong side out, which is easier. However, the correct way is right side out, as they would wear the garment. This takes into account the fact that no body is symmetrical.
Have them take the garment off. Get a note pad and start measuring what you pinned out and where; then writing it all down. If you don't have to take out more than an inch out of a seam you won't need to use your seam ripper to remove seams. However, if you need to take up side seams you are going to have to move pockets. So get your seam ripper out and CAREFULLY start ripping the seams out. Make notes as to where all the bar-tacks are; any top stitching you take out. Pay careful attention to how the garment was sewn together and how the pockets were built. You will not be able to move the back pockets if they are plackets but most front pockets can be.
One other thought, leave any belts loops attached to the body of the pants if you can, because they won't move more than an inch ether way when you get ready to reattach everything. I know weird! You take out nine inches in the waist and the belt loops don't move that much.
Put the pockets back on with any top-stitching and bar-tacking required. Do the center back seam with any top-stitching needed. Sew up side seams and any seam finishing. Add any top-stitching required to the side seams. Pin the waistband from the front to center back. Pin where you need to take out the excess with a seam. Trim the excess out and sew the waistband on. Reattach the belt loops and you are done.
The other way to get rid of the excess fabric in the waistband is to take off whichever end of the waistband would be the easiest to rebuild. If you have a riveted button you would take off the buttonhole end and make a new buttonhole. On these pants if I were to do it this way I would have taken off the button end. Trimmed the excess off and reattached the button. The reason I don't do it the 'correct' way is the zipper and the buttonhole! It can be a total nightmare! The other way is easier for me. And if they wear a belt, who's to know?
Hey, everybody have a good day!
Judy
Update: The post on how to move the front pockets is here, if you need it.
Friday, June 27, 2014
due to the weird
Due to the weird anonymous comments ending up in my spam filter I have turned off the anonymous comments, again.
Really! Your English grammar is worse than mine is! And telling me how wonderful my writing style is, isn't helping your cause any.
I would love to see the statistics as to how many people actually click on the enclosed links in those comments.
Catch y'all later, I'm knee deep in a quilting project and I will post pictures later.
Hope everyone is having a good day!
Judy
Wednesday, June 18, 2014
t-shirt shag rag rug
I decided it would be cool to make Sister Suzy a rug to match her memory quilt.
 I did some research on rag rugs. Ilona over at Life After Money made a couple using the latch hook method. Instructables has a how-to on braided t-shirt rugs. Craftstylish has a how-to for crocheting a rag rug. SheWhoMeasures has a how-to for knitted rugs. Wow, look at what I just found, a PDF booklet on knitted rugs. Spoonful has a tutorial on making a round woven rug and this one from Craftpassion is done with sheets but I think it would work for t-shirts as well.
But none were exactly what I had in mind. I wanted a shag but didn't want to spend any money on a latch hook backing and I didn't have any netting like Ilona in my stash of craft goodies. So I pieced together 4 left-over backs to get a good sized backing. I used a pieced quilt block design of a heart for the center motif from Simplicity and then doubled it. I drew a 3" x 3" grid on my backing. I decided based on what I had left in scraps that two-and-a-half-inch shag would use up too much fabric. I went with 1.5" shag or a 3 inch square of fabric sewn every half-inch and then snipped in half inch segments. I choose to use 3" strips of fabric as opposed to 1/2" wide strips because I thought it would make the sewing easier. If you wanted a tweedy look then you will have to work with a lot of little strips.

As you can tell my half-inch seam allowances are approximate. I would suggest drawing the seam lines if really straight lines are important to you. I ended up marking the ends, middle and quarter to help keep the middle from getting away from me. I also discovered I was off on my grid work by a half a square lengthwise and width. So I should have waited until I laid everything out or spent more time with a paper and pencil! Most of the sites I read suggest spacing of a 1/4" but I just didn't have the fabric. Or the stick-to-it-ness to pull that off! I struggled with the second half because I got bored.

To finish you are suppose to pull each strip until it curls. It really adds a nice finish to the parts I have pulled but I got bored and have not finished that part. I'm hoping that the strips will curl after a run through a washer and dryer like t-shirts with cuts and tears. The last thing for me to do is paint on some non-skid rug backing.
Now for a kitty picture:

She is so concerned about being where she doesn't belong!
Hope every one is having a good day!
Judy
But none were exactly what I had in mind. I wanted a shag but didn't want to spend any money on a latch hook backing and I didn't have any netting like Ilona in my stash of craft goodies. So I pieced together 4 left-over backs to get a good sized backing. I used a pieced quilt block design of a heart for the center motif from Simplicity and then doubled it. I drew a 3" x 3" grid on my backing. I decided based on what I had left in scraps that two-and-a-half-inch shag would use up too much fabric. I went with 1.5" shag or a 3 inch square of fabric sewn every half-inch and then snipped in half inch segments. I choose to use 3" strips of fabric as opposed to 1/2" wide strips because I thought it would make the sewing easier. If you wanted a tweedy look then you will have to work with a lot of little strips.
As you can tell my half-inch seam allowances are approximate. I would suggest drawing the seam lines if really straight lines are important to you. I ended up marking the ends, middle and quarter to help keep the middle from getting away from me. I also discovered I was off on my grid work by a half a square lengthwise and width. So I should have waited until I laid everything out or spent more time with a paper and pencil! Most of the sites I read suggest spacing of a 1/4" but I just didn't have the fabric. Or the stick-to-it-ness to pull that off! I struggled with the second half because I got bored.
To finish you are suppose to pull each strip until it curls. It really adds a nice finish to the parts I have pulled but I got bored and have not finished that part. I'm hoping that the strips will curl after a run through a washer and dryer like t-shirts with cuts and tears. The last thing for me to do is paint on some non-skid rug backing.
Now for a kitty picture:
She is so concerned about being where she doesn't belong!
Hope every one is having a good day!
Judy
Friday, June 6, 2014
chicken scratch quilt blocks
Also know as snowflake embroidery, depression lace, gingham lace or Amish lace.
I will probably never use the instruction my aunt sent my mother, as I'm not that much into embroidery. (I have tendon-n-nerve damage in my hands-n-arms from making a living beating the heat-treating warp out of airplane parts.) I wanted to pass the idea on in case it might be of interest for someone.
Instead of repeating the information that is available out on the web, here are some sources.
http://www.crossstitching.com/chicinst.htm. This information was enclosed in the envelope my aunt sent my mother. It covers fabric, hoops, needles and thread/floss. The information covers two of the stitches used in great detail and gives you a pattern of a heart. There is a video available on the home page, which is very helpful.
The University of West Virginia has an extension newsletter on the subject: http://fh.ext.wvu.edu/r/download/122250. As well as the University of Kentucky: http://www2.ca.uky.edu/hes/fcs/factshts/CT-MMB-712.pdf. Both newsletters have a pattern enclosed of an 8-pointed star.
My aunt enclosed two 18" samples of the 8-point star block.

 I really like the contrasting outline of the second block with the white center of the first block. These blocks were done on quarter-inch gingham. In fact all of the chicken scratch I've seen has been done on the quarter-inch gingham. For a baby it would be cute done on eighth-inch gingham I would think.
Here is the full size pattern that was enclosed with the two blocks.

I would think any pieced quilt block could be converted to a Chicken Scratch pattern if drawn on quarter-inch graft paper.
It appears from the photos of the quilts enclosed in the envelope. My aunt made the quilts at least 4 x 4 in the center and used solid sashings and borders. For each cornerstone she used a two-inch square of the white lace on a four-inch block.
Here are some links to different patterns:
http://crossstitch.about.com/od/chickenscratch/ig/Chicken-Scratch-Patterns/
http://kindawonderful.typepad.com/pink_paper_peppermints/2010/04/chicken-scratch-embroidery-tutorial-free-pattern-and-stitch-guide.html
I hope this is helpful for someone who is curious about this type of embroidery and quilting.
Have a good day!
Judy
I will probably never use the instruction my aunt sent my mother, as I'm not that much into embroidery. (I have tendon-n-nerve damage in my hands-n-arms from making a living beating the heat-treating warp out of airplane parts.) I wanted to pass the idea on in case it might be of interest for someone.
Instead of repeating the information that is available out on the web, here are some sources.
http://www.crossstitching.com/chicinst.htm. This information was enclosed in the envelope my aunt sent my mother. It covers fabric, hoops, needles and thread/floss. The information covers two of the stitches used in great detail and gives you a pattern of a heart. There is a video available on the home page, which is very helpful.
The University of West Virginia has an extension newsletter on the subject: http://fh.ext.wvu.edu/r/download/122250. As well as the University of Kentucky: http://www2.ca.uky.edu/hes/fcs/factshts/CT-MMB-712.pdf. Both newsletters have a pattern enclosed of an 8-pointed star.
My aunt enclosed two 18" samples of the 8-point star block.
Here is the full size pattern that was enclosed with the two blocks.
I would think any pieced quilt block could be converted to a Chicken Scratch pattern if drawn on quarter-inch graft paper.
It appears from the photos of the quilts enclosed in the envelope. My aunt made the quilts at least 4 x 4 in the center and used solid sashings and borders. For each cornerstone she used a two-inch square of the white lace on a four-inch block.
Here are some links to different patterns:
http://crossstitch.about.com/od/chickenscratch/ig/Chicken-Scratch-Patterns/
http://kindawonderful.typepad.com/pink_paper_peppermints/2010/04/chicken-scratch-embroidery-tutorial-free-pattern-and-stitch-guide.html
I hope this is helpful for someone who is curious about this type of embroidery and quilting.
Have a good day!
Judy
Tuesday, May 20, 2014
something else I finished
Here's something else I finished but didn't blog about.

I have always wanted a Faroe Isle shawl. The shape makes so much more sense than a regular triangle or stole type. They have shoulders knitted in so they stay on better. There are two types one that is beautiful lace and a solid one similar to the one I knitted (cause I was cold). So I got busy on Ravelry and found this pattern Top Down Faroese Shawl with Garter Rib Variation by Cate Leonard. I knitted it using US#8 needles. The yarn is Red Hearts Heather in Teal using a little over 3 skeins.
This shawl unblocked but washed and dried in a dryer measures 24 inches down center back, 53 inches along top edge and 102 inches across the bottom edge. My ribbing was 5 and half inches deep.
I started this as the directions called for; got to the ribbing and did not like the body of the shawl. Ripped it out and started over. The band is garter stitch (cast-on 7 stitches). The body of the shawl was done in stockinette and I think it looks so much more polished to me. I slipped the first stitch on each row.
All increases in the body were, make one front and back, with yarn overs for the increase at the band and back panel. My increases in the ribbing were done on rows 3 and 4; they were knit in the front and back of the first stitch to eliminate the hole. I figured out how many increase per section and used stitch markers to keep track of where I was on the increases and to make sure I did not forget any. There are 9 increases in section one, 12 increases in next RS row and 2 in back panel. Section two has 14 increases, 17 increases in the next RS row and 2 in back panel. Section three has 17 increases, 24 increases in the next RS row and 2 in the back panel.
I used a Russian join for adding in the next skein.
I added a short row of garter stitch in the band every ten ridges as per Techknitter’s instruction on how to keep the garter stitch bands from curling with stockinette. Thank-you Techknitter it works like a charm!
I used Jeny’s Surprisingly Stretchy Bind-off. Man I love this bind off!

I made this shawl pretty much per the directions because I couldn't figure out how to up-size it for me. If I were to make one for me I think I would increase the size of the back center panel at the neck. Then I would add a few more increases in the body of the shawl and make the body a little bit longer as I am considerable rounder than Sister Suzy and I would like it a few inches longer.
I doubt, however, I will ever make another shawl especially for myself because the backs of my arms get cold not my shoulders. Draping a sweater around my shoulders doesn't help my cold arms. I have to put my arms in the sleeves for them to warm up.
Hope everyone is having a good day!
Judy
I have always wanted a Faroe Isle shawl. The shape makes so much more sense than a regular triangle or stole type. They have shoulders knitted in so they stay on better. There are two types one that is beautiful lace and a solid one similar to the one I knitted (cause I was cold). So I got busy on Ravelry and found this pattern Top Down Faroese Shawl with Garter Rib Variation by Cate Leonard. I knitted it using US#8 needles. The yarn is Red Hearts Heather in Teal using a little over 3 skeins.
This shawl unblocked but washed and dried in a dryer measures 24 inches down center back, 53 inches along top edge and 102 inches across the bottom edge. My ribbing was 5 and half inches deep.
I started this as the directions called for; got to the ribbing and did not like the body of the shawl. Ripped it out and started over. The band is garter stitch (cast-on 7 stitches). The body of the shawl was done in stockinette and I think it looks so much more polished to me. I slipped the first stitch on each row.
All increases in the body were, make one front and back, with yarn overs for the increase at the band and back panel. My increases in the ribbing were done on rows 3 and 4; they were knit in the front and back of the first stitch to eliminate the hole. I figured out how many increase per section and used stitch markers to keep track of where I was on the increases and to make sure I did not forget any. There are 9 increases in section one, 12 increases in next RS row and 2 in back panel. Section two has 14 increases, 17 increases in the next RS row and 2 in back panel. Section three has 17 increases, 24 increases in the next RS row and 2 in the back panel.
I used a Russian join for adding in the next skein.
I added a short row of garter stitch in the band every ten ridges as per Techknitter’s instruction on how to keep the garter stitch bands from curling with stockinette. Thank-you Techknitter it works like a charm!
I used Jeny’s Surprisingly Stretchy Bind-off. Man I love this bind off!
I made this shawl pretty much per the directions because I couldn't figure out how to up-size it for me. If I were to make one for me I think I would increase the size of the back center panel at the neck. Then I would add a few more increases in the body of the shawl and make the body a little bit longer as I am considerable rounder than Sister Suzy and I would like it a few inches longer.
I doubt, however, I will ever make another shawl especially for myself because the backs of my arms get cold not my shoulders. Draping a sweater around my shoulders doesn't help my cold arms. I have to put my arms in the sleeves for them to warm up.
Hope everyone is having a good day!
Judy
Saturday, May 17, 2014
the scarf that didn't get a post
The scarf that I forgot to photograph and post about. What's with that?
 According to my notes this scarf was #7 of my knitting frenzy from back in April of 2012. Wonder what got me sidetracked from finishing the project? (documenting the process)
The pattern was The Unicorn Pegasus Rainbow Scarf by Huan-Hua Chye. I used partial skeins of Mainstays 4 ply Worsted Multi and Vanna's Choice Rose. I knitted the scarf on US#8s. The scarf is 6 1/2" wide and 48" long. A great little garter stitch project. It is unbelievably soft.
 I didn't bother with blocking. I ran it through the washer and dryer. If crisp corners are important go for it.
Have a good day!
Judy
The pattern was The Unicorn Pegasus Rainbow Scarf by Huan-Hua Chye. I used partial skeins of Mainstays 4 ply Worsted Multi and Vanna's Choice Rose. I knitted the scarf on US#8s. The scarf is 6 1/2" wide and 48" long. A great little garter stitch project. It is unbelievably soft.
Have a good day!
Judy
Friday, May 2, 2014
well duh
I got to thinking about how hot steering wheels get here in Phoenix in the summertime so I went on to Ravelry and starting looking for a steering wheel cover I could knit. I came up with this one: Diagonal Garter Stitch Steering Wheel Cover by Garilynn.
I just could not visualize the cast-on and first few rows. So I got out my instruction for a diagonal scarf I have knitted but have not posted about (What's with that?) and knitted for about a foot until the light bulb went off. DUH! After the light bulb went off, I ripped it all out and started over using Helen Griffin of Golden Apples Blog you tube video on a crochet cast-on for a provisional cast-on and followed the directions in Garilynn's pattern. By the way, Helen has posted some really nice videos on different knitting techniques go check her out.
I wanted to make the steering wheel cover out of cotton. I had three choices, a blue or white in Lion Brand Cupcake (Which after I had knitted the cover discovered it is not cotton but acrylic.) And a pale lime green from Bernat Cottontots. I decided on the blue Cupcake called Blueberry and the green Cottontots called Sweet Green. I knitted it with US#6 needles. I only cast on 21 stitches to get the 4" width I needed to go around the steering wheel. While researching patterns I came across notes on one pattern that recommended knitting the length at 60% of the outside circumference of the steering wheel. I knitted mine at 70%. My steering wheel is about 46" around. 31" stretched to about 46". I used the Kitchener Stitch to graft the two ends together and stitch the sides together after placing the cover on the steering wheel.
 I did not use any non-slip material under the cover as recommended in the pattern. If Hubby thinks it needs to really grip the steering wheel then I will put some non-slip stuff I used on our slippers on the inside of the cover.
I hope everyone is having a good day!
Judy
UPDATE: With use the cover has gotten looser. The next one I make will only be 3 inches wide and 3 or 4 inches shorter in hopes of it staying tighter on the steering wheel.
I just could not visualize the cast-on and first few rows. So I got out my instruction for a diagonal scarf I have knitted but have not posted about (What's with that?) and knitted for about a foot until the light bulb went off. DUH! After the light bulb went off, I ripped it all out and started over using Helen Griffin of Golden Apples Blog you tube video on a crochet cast-on for a provisional cast-on and followed the directions in Garilynn's pattern. By the way, Helen has posted some really nice videos on different knitting techniques go check her out.
I wanted to make the steering wheel cover out of cotton. I had three choices, a blue or white in Lion Brand Cupcake (Which after I had knitted the cover discovered it is not cotton but acrylic.) And a pale lime green from Bernat Cottontots. I decided on the blue Cupcake called Blueberry and the green Cottontots called Sweet Green. I knitted it with US#6 needles. I only cast on 21 stitches to get the 4" width I needed to go around the steering wheel. While researching patterns I came across notes on one pattern that recommended knitting the length at 60% of the outside circumference of the steering wheel. I knitted mine at 70%. My steering wheel is about 46" around. 31" stretched to about 46". I used the Kitchener Stitch to graft the two ends together and stitch the sides together after placing the cover on the steering wheel.
I hope everyone is having a good day!
Judy
UPDATE: With use the cover has gotten looser. The next one I make will only be 3 inches wide and 3 or 4 inches shorter in hopes of it staying tighter on the steering wheel.
Monday, April 14, 2014
looky what I rescued

I have no idea what kind of cactus it is, but I think it is a type of prickly pear. I have seen prickly pears around Phoenix that have a more elongated pad than the classic round pads. Wonder what type and color of flower it has when it blooms? And what the tunas (fruit) taste like, cause evidently it tastes good to some bird.
Everybody have a good day!
Judy
Thursday, April 10, 2014
sister suzy's memory quilt
We've been saving t-shirts for quite awhile, from grade school through high school. I had to wait on a few that she wasn't ready to give up.

The blocks are 12 x 12-inches. While doing research on how to put the quilt together, there were several different opinions on seam allowances. Most suggested half-inch while a few suggested quarter-inch. I used half-inch, but if I make another one I will use quarter-inch and see which one I like best. One of the suggestions was that you need one t-shirt per block. We didn't have that many shirts. What we did have was most of the t-shirts were printing on the front and back, as well as on the sleeves of several t-shirts. So look your shirts over to see what you have.
You will want to use a featherweight iron-on interfacing or interfacing for single knit. Be sure to check your interfacing for stretch and place the interfacing stretch 90 degrees to the stretch of your t-shirt before ironing. I cut my interfacing the exact size I wanted for my block which in this case was 13 x 13" for the large blocks. This includes the seam allowances. Some sites said you wanted to purchase a half-yard of interfacing per block. There are 42 blocks in this quilt. That would have been 21 yards of interfacing! I found some 72" wide interfacing and only picked up 6 yards. I had more than enough.

Because of the expense of just obtaining the rights to run two shows of Beauty and the Beast from Disney and the fear of potential hassles over copyright infringements their theatre director choose not to make everyone shirts for this play. So, we saved a hand-bill and copied it onto light fabric, transfer paper and ironed the transfer onto the back of one of her shirts. (I could do a full-blown rant on the cost of obtaining the rights to do this play by a very small high school. Let's just say, I think, Disney should be ashamed of themselves!)

This is a photograph of the girls in her class and the woman class sponsor on their senior trip to Missouri. Everyone had great fun dressing-up in period clothing and posing. She doesn't know about this block, it was a piece of last minute inspiration. You can see I had trouble getting the iron-on to separate from the backing. I didn't try this with regular woven fabric; I wonder if the transfer would have separated better?
 On to the piecing! This block is strips pieced together from a shirt. The top part of the block was from the front and the bottom part of the block is two strips from the back. I felt I would have had too much empty space if I had made two blocks instead of one.
 On this block the upper-wing of the mockingbird was just a little bit above the neckline of the shirt, so I turned the square ruler a bit to pick up all of the decal. Then I set the block off-center to finish filling it out to the 12-inch block I wanted.
 This block is from the long sleeve of one of her shirts, denoting her contribution to the production.
I did the backing in flannel with no batting.
There were several factors involved with the decision to tie the backing and top together. One being the top was heavy and I didn't want to add any more weight to the quilt. If you get the quilt too heavy you will need an industrial washer to clean it. Next, I didn't want any quilting to distract the eye from what was going on in the blocks.
So technically this blanket is not a quilt but a comfort. The difference is whether or not you sew the layers together, so say the old ladies my mother quilted with. Also, most comfort's binding is the backing pulled forward and covering the raw edges. Which is how I bound this one.
 Well the label is now on; time to finish up the surprise that goes with this comfort.
I hope everyone is having a good day!
Judy
UPDATE: June 18, I forgot to photograph how I fixed a couple of holes in the flannel where it looks like the material got caught during printing.
 The best part is she loved the repair! Judy
The blocks are 12 x 12-inches. While doing research on how to put the quilt together, there were several different opinions on seam allowances. Most suggested half-inch while a few suggested quarter-inch. I used half-inch, but if I make another one I will use quarter-inch and see which one I like best. One of the suggestions was that you need one t-shirt per block. We didn't have that many shirts. What we did have was most of the t-shirts were printing on the front and back, as well as on the sleeves of several t-shirts. So look your shirts over to see what you have.
You will want to use a featherweight iron-on interfacing or interfacing for single knit. Be sure to check your interfacing for stretch and place the interfacing stretch 90 degrees to the stretch of your t-shirt before ironing. I cut my interfacing the exact size I wanted for my block which in this case was 13 x 13" for the large blocks. This includes the seam allowances. Some sites said you wanted to purchase a half-yard of interfacing per block. There are 42 blocks in this quilt. That would have been 21 yards of interfacing! I found some 72" wide interfacing and only picked up 6 yards. I had more than enough.
Because of the expense of just obtaining the rights to run two shows of Beauty and the Beast from Disney and the fear of potential hassles over copyright infringements their theatre director choose not to make everyone shirts for this play. So, we saved a hand-bill and copied it onto light fabric, transfer paper and ironed the transfer onto the back of one of her shirts. (I could do a full-blown rant on the cost of obtaining the rights to do this play by a very small high school. Let's just say, I think, Disney should be ashamed of themselves!)
This is a photograph of the girls in her class and the woman class sponsor on their senior trip to Missouri. Everyone had great fun dressing-up in period clothing and posing. She doesn't know about this block, it was a piece of last minute inspiration. You can see I had trouble getting the iron-on to separate from the backing. I didn't try this with regular woven fabric; I wonder if the transfer would have separated better?
I did the backing in flannel with no batting.
There were several factors involved with the decision to tie the backing and top together. One being the top was heavy and I didn't want to add any more weight to the quilt. If you get the quilt too heavy you will need an industrial washer to clean it. Next, I didn't want any quilting to distract the eye from what was going on in the blocks.
So technically this blanket is not a quilt but a comfort. The difference is whether or not you sew the layers together, so say the old ladies my mother quilted with. Also, most comfort's binding is the backing pulled forward and covering the raw edges. Which is how I bound this one.
I hope everyone is having a good day!
Judy
UPDATE: June 18, I forgot to photograph how I fixed a couple of holes in the flannel where it looks like the material got caught during printing.
Subscribe to:
Comments (Atom)